Homemade yogurt with a yogurt maker, a healthy and eco-friendly choice.
If you have also decided to adopt a healthier and more sustainable lifestyle, your daily consumption choices are probably aimed at reducing environmental impact, including preferring non-industrial foods. Yogurt could be one of these choices. Considered a healthy food for its beneficial properties, it is generally sold at the supermarket in 125ml plastic or glass jars, fortunately increasingly often in paper. Alternatively, you can get into the habitof preparing homemade yogurt, , which is good for you and reduces waste. The simplest and quickest way to do this is to use a yogurt maker. Here is everything you need to know about homemade yogurt with a yogurt maker and how to prepare it.
What is yogurt and why is it good for you?
Yogurt is a very ancient and widely consumed food made from milk, characterized by a creamy consistency and a slightly acidic taste. This is due to the way it is made, namely through sour fermentation by lactic ferments. Lactic ferments are lactic acid bacteria Lactobacillus bulgaricus and Streptococcus thermophilus - capable of metabolizing lactose or a similar carbohydrate, which is transformed into lactic acid. In addition to cow's milk, various types of milk can be used, including plant-based ones, which is why some yogurts are suitable foods for those who are lactose intolerant or have chosen a vegan diet. Lactic ferments, once inoculated into milk, multiply by transforming it into yogurt with the formation of a denser curd. The higher the fat or oil content of the starting ingredient, for example whole UHT milk, the creamier the consistency will be. If you prefer a more compact yogurt, do not mix it at the end of the process, while for a creamy yogurt, the mixture should be stirred once the fermentation is done.
The lactobacilli, once they reach the stomach, die due to the presence of gastric juices; therefore, today it is believed that the recognized beneficial properties of yogurt are not attributed to it, but to probiotics,fermentations that can be added to the preparation and that are able to overcome the barrier of gastric juices and survive in the intestine, where they reproduce with beneficial effects for health. Among these are the the rebalancing of intestinal flora, thestrengthening of the immune system and the prevention of bacterial and fungal infections. Other beneficial properties of yogurt are due to its nutritional content and consist of providing vitamins, calcium, potassium, and sodium.
Advantages of homemade yogurt
As we have already mentioned, one of the advantages of homemade yogurt is the possibility of reducing waste, making a more ecological choice. If you are a daily consumer of yogurt, you will avoid throwing away many empty containers in the trash and you will also save a lot of money, because the cost of buying ingredients for homemade yogurt production is significantly cheaper than that for industrial yogurt, especially if you are attentive to quality. However, the one who benefits the most is your health, because you can make a genuine food without colorants, artificial flavors, or preservatives of any kind. Homemade yogurt contains only what you choose to put in it; therefore, if the basic ingredients are of high quality, you can be sure that you will have a product of equal quality. It will keep in the fridge for a few days, 4 or 5 at most, which means that you will always consume a very fresh product. Finally, you can create the yogurt of your preference, choosing the ingredients to flavor it but also the type of milk you use as a base, which can also be lactose-free, rice, oat, soy, coconut or almond milk. The result will certainly be less creamy than that obtained with whole cow's milk, but with some adjustments, such as extending the fermentation times or adding a little sugar, you can achieve good results.
What types of yogurt makers exist and which one is the best
The yogurt maker is a small appliance that allows you to produce yogurt in 6/12 hours starting from two simple ingredients: milk and lactic ferments. The yogurt maker works by keeping the mixture at a constant temperature below 55°, promoting the growth of ferments and the fermentation process. There are two types of domestic yogurt makers, those with a carafe and those with individual jars.
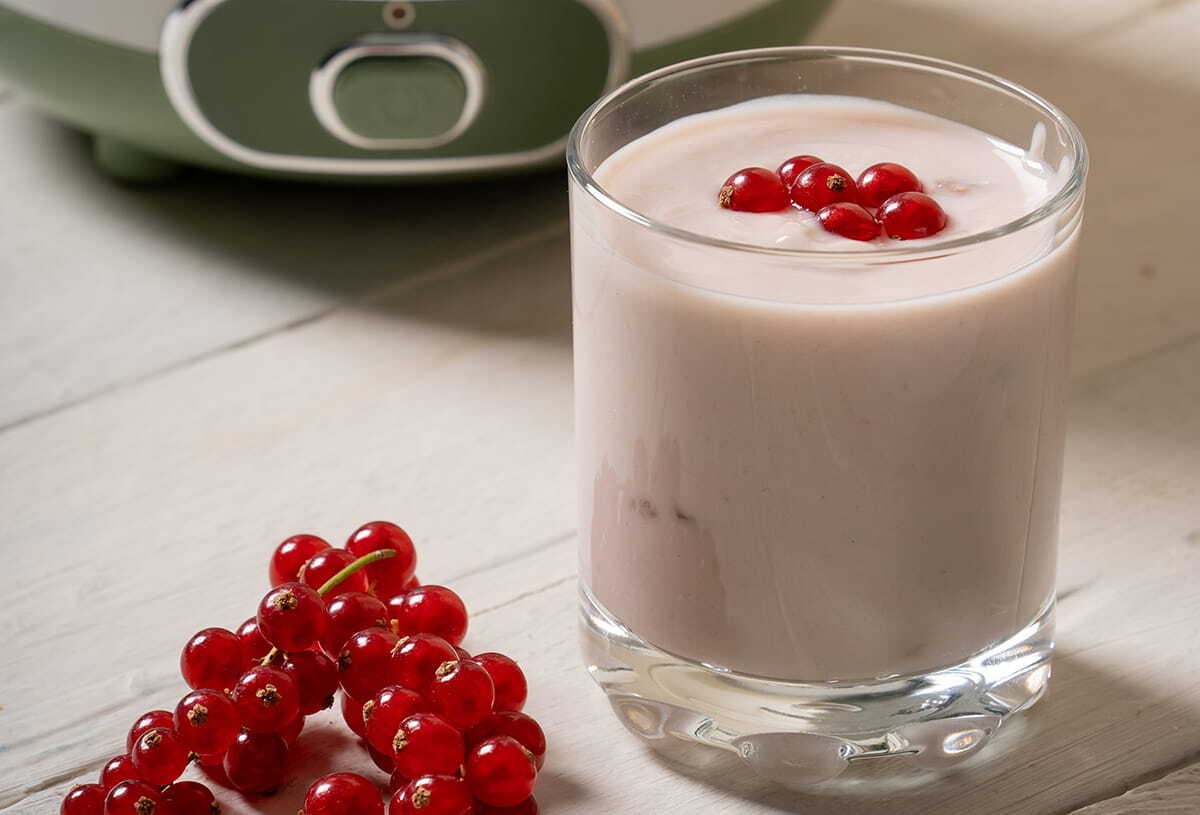
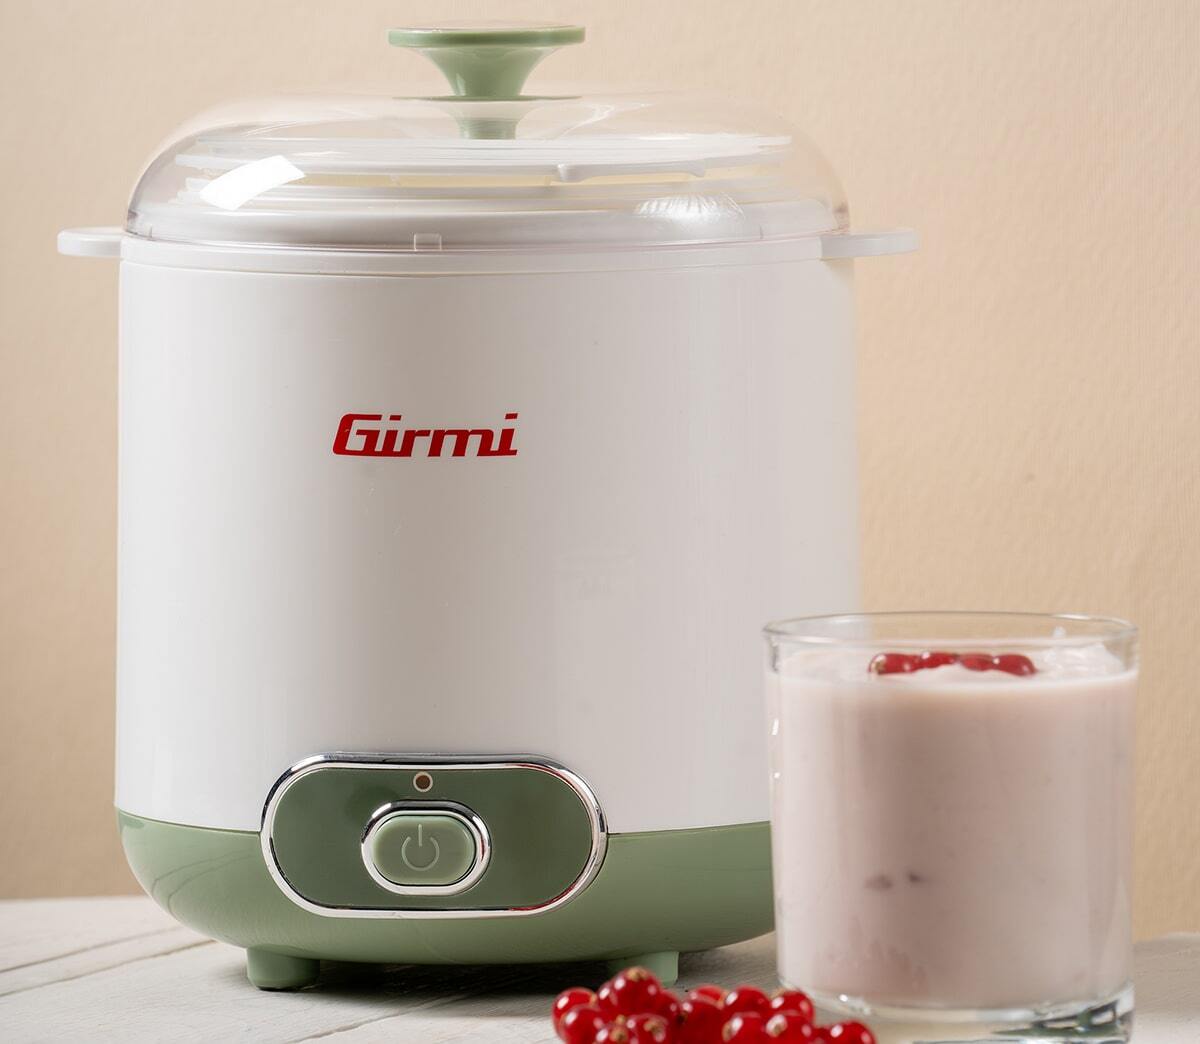
The most economica and compact electric yogurt maker is the carafe one, like the one YOGURT MAKER YG02 by Girmi, equipped with a large 1.5-liter container with a transparent lid and handle, which operates at a working temperature of around 55°C to produce a creamy and soft yogurt.It is also equipped with accessories to produce Greek yogurt, a thicker and creamier variant obtained by removing the whey and other liquids from yogurt, which retains a higher nutrient content. Instead of carrying out this operation with a kitchen towel, the accessory for draining the yogurt is very practical and can be easily washed in the dishwasher, as well as the container and other accessories. It is advisable to choose it if you consume a large amount of yogurt for the whole family: you can produce over a liter of natural white yogurt and then let everyone garnish it with their favorite toppings such as fresh fruit, honey, nuts, or other.
YOGURT MAKER YG03 by Girmi, instead, it isa yogurt maker with jars. Thanks to the 7 single-dose glass jars, each member of the family can have their favorite yogurt. Each yogurt jar has a lid and can be stored separately in the refrigerator to be consumed at will. This is a model suitable for those who prefer to prepare single servings and diversify the product.
How to make yogurt with a yogurt maker
If you have arrived this far, you must be wondering what the recipe for homemade yogurt is and is and how to make it.The process is really simple and does not require any effort. It starts with choosing the milk, which is important to give the right creaminess to the yogurt or to limit the intake of lactose in case of intolerances. Here we will see the basic recipe for natural yogurt with whole or partially skimmed milk, which varies slightly depending on whether a carafe or jar yogurt maker is used.
With the yogurt maker with jars 1200ml of milk are poured into a saucepan and, maintaining a low flame, stirred until reaching a temperature of 42°C-44°C which facilitates the transformation of lactose into lactic acid.At this point, add the starter culture. You can use powdered lactic ferments, which can be purchased at a pharmacy or natural food stores, or a jar of whole white yogurtas a substitute. Next time you can use a homemade yogurt jar, but after a few uses it is better to start again with a new jar purchased at the supermarket. If you choose freeze-dried powder, it must be dissolved in a glass with 180ml of milk before pouring it into the rest of the milk and mixing thoroughly. The powder doses are indicated on the packaging, but generally one packet is sufficient for about 1 liter of milk. The resulting mixture can be poured directly into the seven containers.
With the carafe yogurt makeryou use a liter of milk, which must be heated in a saucepan beforehand. Then, pour the powdered lactic ferments or a jar of natural yogurt into a glass to which you add 200 ml of the previously heated milk. After mixing well until the compound is completely dissolved, pour the mixture obtained into the remaining milk and mix thoroughly before pouring it into the yogurt maker container.
To help the fermentation process, especially in the case of lactose-free milk or soy milk, it is recommended to add a spoonful of sugar.
Once the appliance is turned on, the compound must remain in operation without being opened for at least six hours. The longer the fermentation lasts, the thicker the mixture will become. However, one should not exceed 12 hours, otherwise the yogurt could become too sour. You will then see a yellowish liquid on the surface: the product can still be consumed but it will have a more acidic and less pleasant taste.
After the fermentation time has passed, turn off the appliance, let the containers cool well nd then put them in the refrigerator for at least two hours before consuming the yogurt.
Yogurt maker recipes: what types of yogurt can be made at home
There are many recipes for yogurt makers and all it takes is a little imagination to customize them to your liking. To make drinkable yogurt you can follow the same procedure as regular yogurt but shortening the fermentation time. To make Greek yogurt, as we have already seen, you have to strain the yogurt obtained with the yogurt maker. For fruit yogurt you can decide to add fresh fruit at the end or blend it and add it to the mixture during fermentation. In this last case, however, to avoid the mixture from being too liquid, it is advisable to cook the fruit in small pieces in a saucepan for five minutes before adding it to the mixture in order to allow it to lose some of its liquid. Yogurt can be flavored before putting it in the yogurt maker with creams, such as pistacchio, cocoaor hazelnut, or coffee or vanilla, can be used, using milk that has been previously boiled with a vanilla pod. For vegetable yogurt, as we have seen, the problem is that it could remain too liquid. Adding sugar before fermentation can help, as can the use of a natural thickener such as agar agar, useful for example in preparing coconut yogurt (made from vegetable drink and coconut milk).